Download the written instructions here:
F Tool™ Instructions PDF
A well-playing harp has a solid connection to the vocal tract. A big part of what makes it is easy to play, sound nice and fat is that it's airtight.
If it leaks air, the connection between your vocal tract and the instrument is weakened and the harp feels stiff. The tone is also weaker.
The good news is air leaks are fixable! In fact, that's the fundamental step in improving a harmonica. If you skip this step, you will usually end up working against yourself further down the line.
Some air leaks are obvious and easy to close off. For example, flat-sanding the draw reed plate will instantly improve your harp. A flat comb is another instant improvement to air tightness.
But some air leaks are harder to find. Have you ever worked on a harp for days and it still won't play right? If you keep embossing and the response isn't getting any better, that's a clue you have an air leak you have not identified. Further embossing won't do any good - it will just make the harp buzz. Sound familiar?
A notoriously difficult air leak to eliminate is a reed plate that is bowed front-to-back. Here's what I mean.
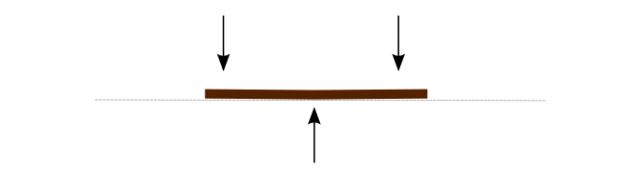
This is a harmonica seen form the side. This is the ideal condition - most harps are like this:

The reed plate can be curved upwards:

Or the reed plate can be curved downwards:

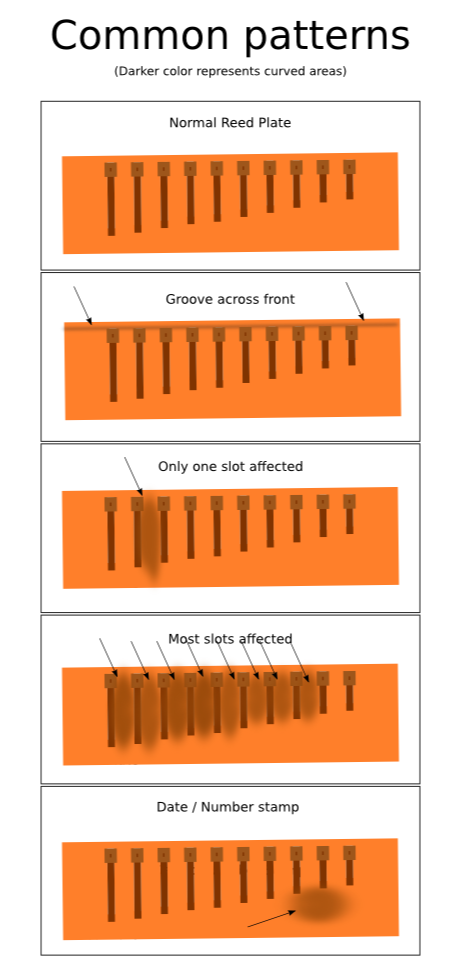
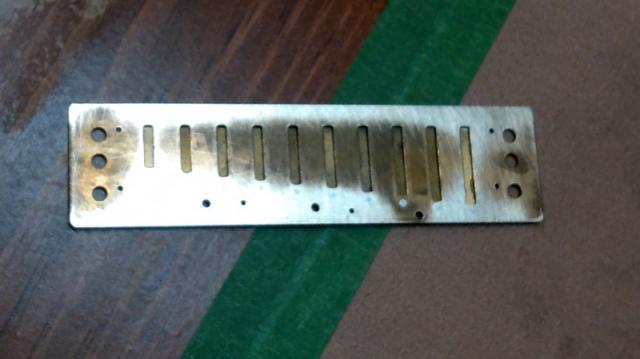
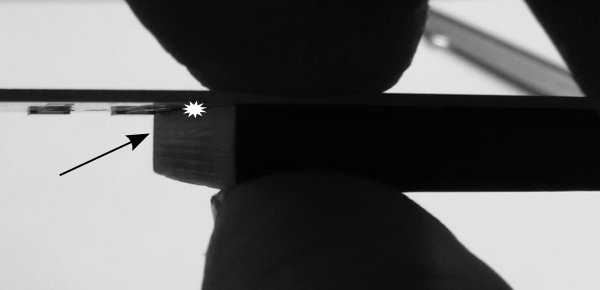
To find those leaks, you can't just look at the harp from the side because the reed plate may not be bowed along it's full length. The bow may only affect a few holes, each one with the dent in a different spot. The dark areas of this reed plate reveal where it's bowed. You would need to slice the harp into ten pieces and look at each cross section to see the leak!
Fortunately, you can see the leaks between the reeds using a well-positioned French Tuner and a good source of light. The trick is to look for them!

There is no shortcut, you need to check in between every single slot. It takes time, but after a little practice, you can check the whole reed plate in about a minute or two.
But how do you fix a reed plate that's bowed front-to-back? You can't flat-sand a blow plate because the reeds are in the way.
Besides, any reed plate with a deep bow can't be fixed with flat sanding alone - you would need to sand away too much of the surface. Not to mention flat sanding won't correct the bend in the slot on the opposite side. On the draw plate, that's where the reeds are and it can make reed work complicated.
Use pressure and counterpressure to straighten a reed plate bowed upwards:
Use pressure and counterpressure to straighten a reed plate bowed downwards:
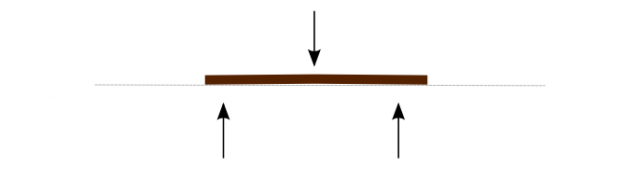
I have used several iterations of a method to apply pressure and counterpressure on a reed plate to straighten out this kind of curve. My method is precise. It's also easy to gauge how much force you need to apply so that you don't overshoot and create more work for yourself (or at an extreme, destroy the reed plate beyond repair). My method also provides safety so you don't trample the reeds!
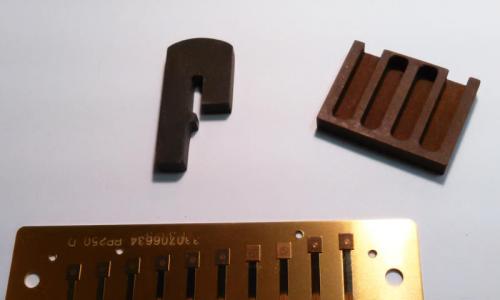
As it turns out, the most recent version of my method looks like the letter "F". I didn't plan it that way, it's just that the lowercase letter F has a lot of potential to straighten curved reed plates. That made finding a name for this tool easy!
Method
- Check the curve in the plate between every reed.
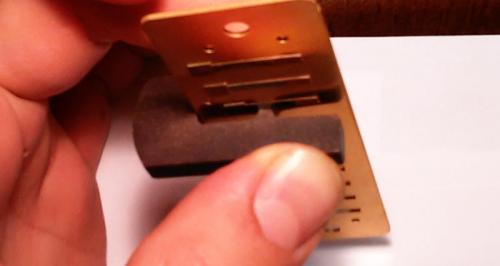
Place the French tuner onto the reed plate and apply pressure at the back of the tool.
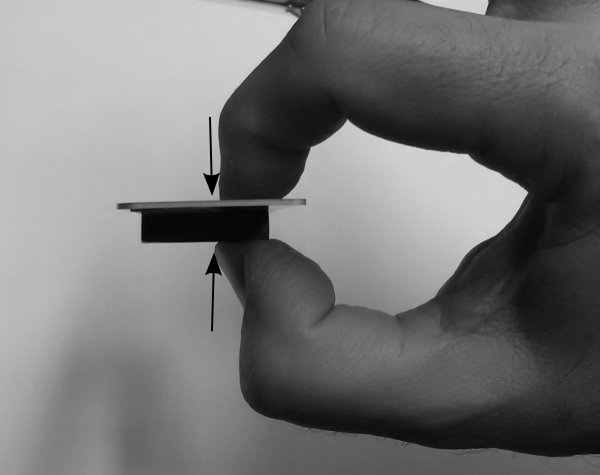
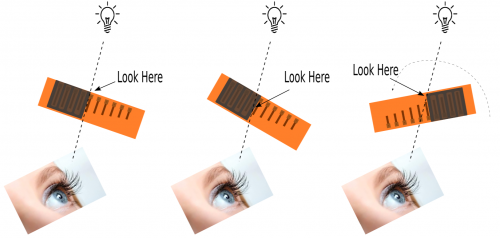
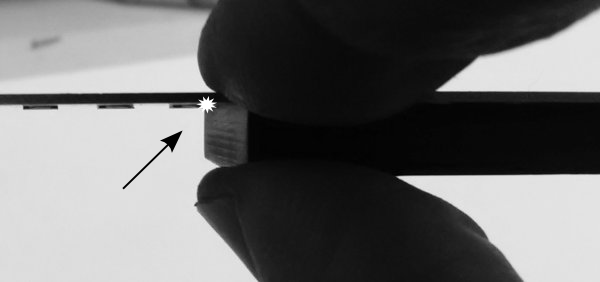
Hold the plate and tool to the light and look at the other end of the French Tuner. If the reed plate is straight, you will not see any light at the base or at the middle of the reed plate. If the reed is bowed, you will see light shining either the tip or the middle of the plate.
Angle your view to look for light shining through the front of the French Tuner. If the light is seen at the tip, the plate is curved upwards. If the light is seen in the middle, the plate is curved downwards.
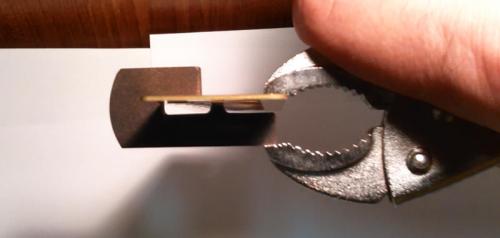
- Decide where you would like to apply pressure to straighten the curve. Hold the F tool upside down in your left hand. Hold the reed plate in your right hand. Be mindful of the tips of the reeds as you position the F tool so that they don't get caught or bent by the tool.
- Position the bump in the F tool over the spot where you want to apply pressure. Ensure the bump is centered between both reeds of the adjacent slots. Ensure the tool is lined up in a straight line. When the position is checked, hold the plate onto the tool with your left hand. Use your fingers or a pair of pliers and gently squeeze the free end of the reed plate against the bump. I find a reproducible way to apply pressure is to "bounce" between 2 and 5 times using light force with each bounce. If you need to subsequently apply a little more straightening, bounce a few more times with equally light pressure.
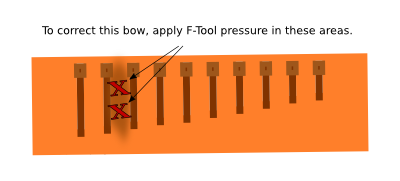
To correct a deep bow, you may want to apply light pressure in two or three spots rather than lots of pressure concentrated in one area.
Don't practice on your best harps! You can easily damage a reed plate beyond repair if you apply too much force. As with anything, there is a learning curve.
- Re-asess the straightness using the French Tuner and repeat the steps until no light can be seen between the FT and the plate.
- Repeat the process for each of the other slots.
Remember that you don't want to over-do it.
With a little practice, you can measure and straighten a badly-bowed reed plate in just a few minutes time.
Draw reed plate
See hot to use the F tool on the draw reed plate, too!