"...Here's how you do it: Only emboss half the slot...."
Embossing is SO misunderstood.
Embossing decreases the amount of space between the reed and the slot. It's as simple as that!
Why do it?
- You want to improve response
- You want a little more volume
- You like a bright sound
Why would you not want to emboss?
- You don't like bright tone
Embossing doesn't fix anything!
Do not ever try to fix a problem with embossing. If a note doesn't play well, spending 30 seconds embossing won't help. And when you are not happy with the result and decide to emboss some more - this time with more force - you will probably overdo it and end up damaging the reed plate.
To fix a misbehaving reed, make the harp airtight and fix the shape of the reed. Once you have done that, you can try embossing to add a little extra juice.
Embossing isn't just for overblows!
It would be a challenge to set up a harp for overblows without embossing, but that doesn't mean you can't take advantage of the benefits of embossing on a general-purpose harmonica.
Also, in of itself, embossing doesn't make your harp play overblows any easier. Not to any useful degree anyway... Again, the shape of the reeds counts for a whole lot more.
The Dark side of embossing
Embossing can cause problems. If you overdo it, your reeds will start to sound thin and the high overtones will become more present. As you continue to emboss, you will start to hear the reeds buzz. If you continue further, you will make the reed seize.
None of this causes permanent damage; you can undo embossing. But if you force the reed while trying to fix the damage, you can wreck your harp.
Embossing a harp is a job that takes a few minutes. If you are spending more time fixing the damage than you are spending time embossing, you are doing something wrong! I'm not saying you should rush your work but if you are spending hours embossing, you should probably re-think your process.
Less is more: Get the advantages without the drawbacks!
Gentle embossing can offer you a lot of the advantages of embossing while avoiding 99 per cent of the drawbacks.
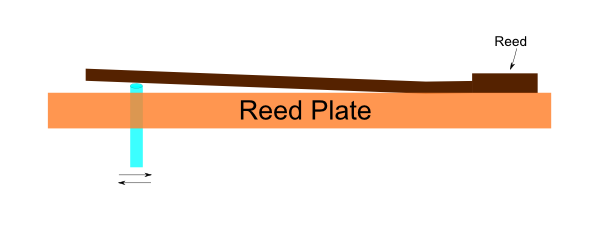
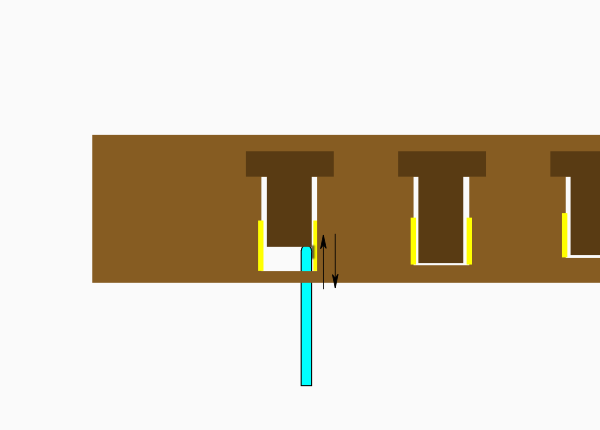
Here's how you do it: Only emboss half the slot.
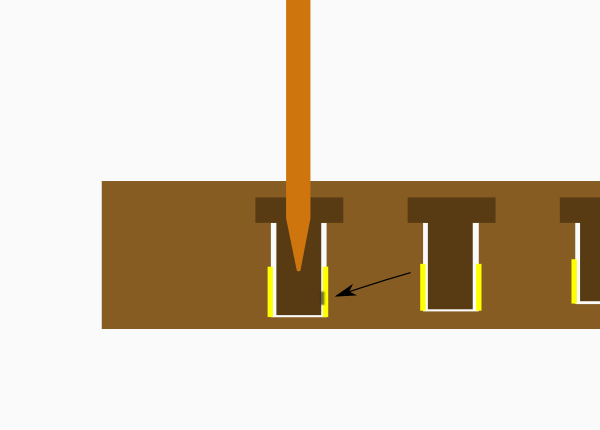
Find a round metal object like a 10mm chrome-plated socket driver, or the tip of one of my pin vises.
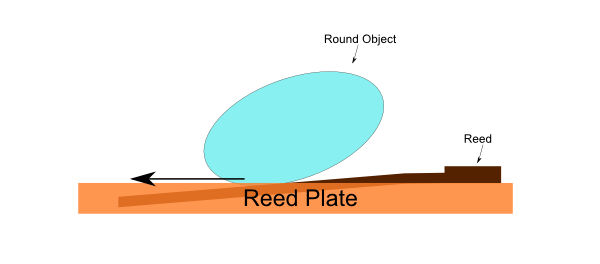
Hold the object halfway down the slot and press down. Press about as hard as you press a touch screen phone. Move the round object towards the free end of the slot (towards the reed tip).
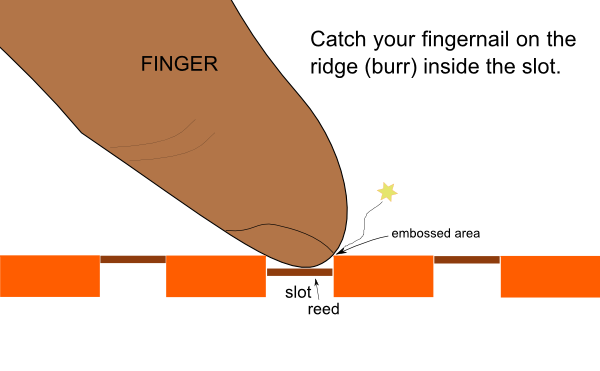
You won't be able to see the little ridge you have created on the inside of the slot just by looking at the reed plate. Feel the inside of the slot with your fingernail. Pick at the side to see if you have created a little ridge on the inside of the slot. If you feel nothing run the round object down the slot again, this time with a little more force.
Do it until you have used just enough force to create a ridge (or burr) on the inside of the slot. Repeat the process on all the other slots one at a time starting from the halfway point and going to the free end.
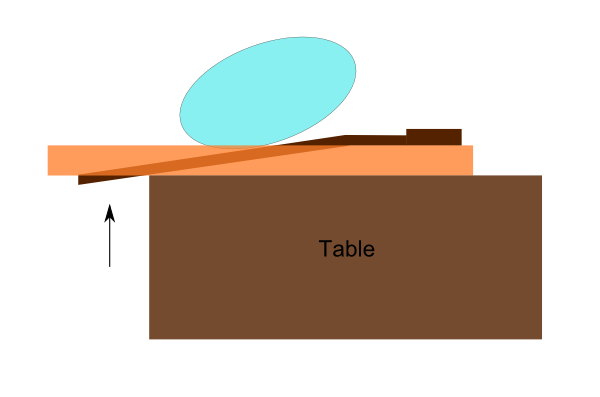
On the weighted low reeds, you may need to position the reed plate over the edge of a table so that the tip of the reed can "peek" out the bottom of the slot as you move your round tool towards the tip.
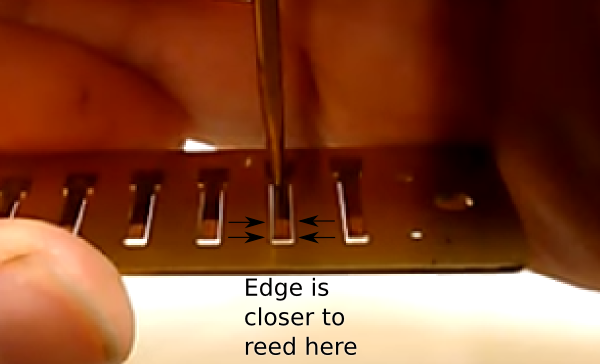
Next, check your work. Use this hand position and angle the reed plate to look through the slots:
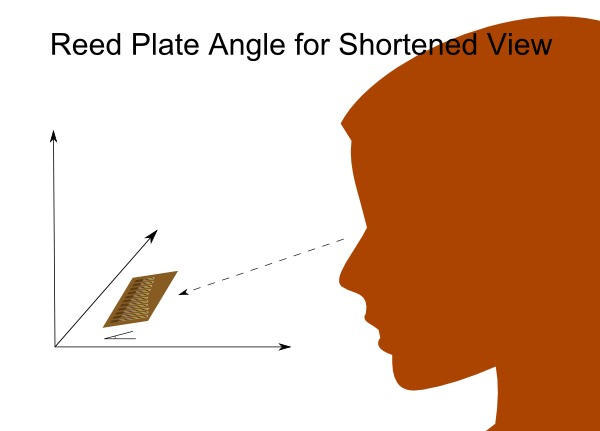
The shortened view of the slot is a low-tech way to zoom in and see how close the reed is to the sides of the slot. No extra equipment required (Microscope, Light Table, etc...)
Push the tip of the reed through the slot while you are looking to see if the reed touches any part of the sides. You'll also see if the reed is off-center as you do this. If you embossed with gentle finger pressure you should still have lots of room on either side of the slot.
If you overdid it in some areas, you will see it using this view. You may also notice the reed has a prickly/buzzy sound or maybe it doesn't even plink? To fix it, push the ridge of metal back. Use gentle force in the areas you need to target so that you don't completely undo your work.
Use a round piece of metal like a reed tool or a safety pin.
Since you only worked on the front half of the slot, you should be able to get your tool in position from the under side of the slot. The reed won't be in your way, it will simply be pushed up a little. Plink the reed a few times and re-check.
Now, put the harp back together and play it! You should notice more responsiveness and louder sound.
The reed shape, gap and tuning should be unchanged after embossing this way because we only worked on the free end of the slot. Not bad for a few minute's work! This method is a real time-saver!
If you are interested in embossing to the fullest possible limits, try Full Slot Embossing.