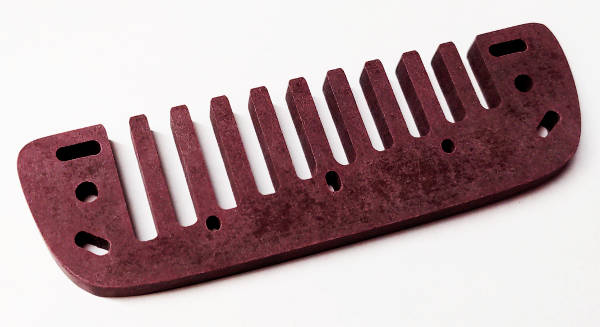
Lee Oskar
Fits Lee Oskar harmonicas.
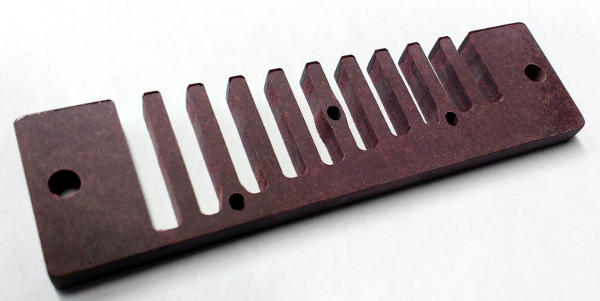
Fits Lee Oskar harmonicas.
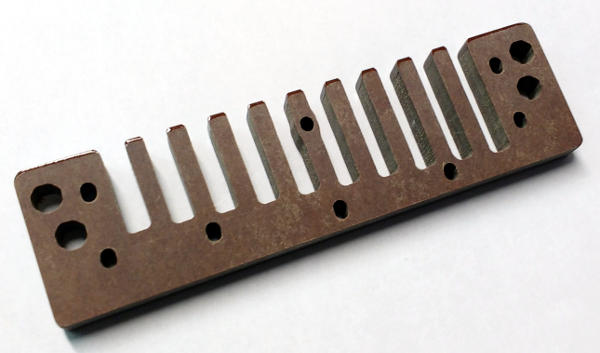
Fits the following harps:
Suzuki Manji, Promaster, Suzuki Olive.
Also fits
- Dabell Contender
- Dabell Noble
- Suzuki HarpMaster, BluesMaster (*)
- Bushman Delta Frost(*)
The stock Manji comb is slightly smaller than the reed plates. My comb is a hair bigger than the plates so that the harp is more comfortable to hold.
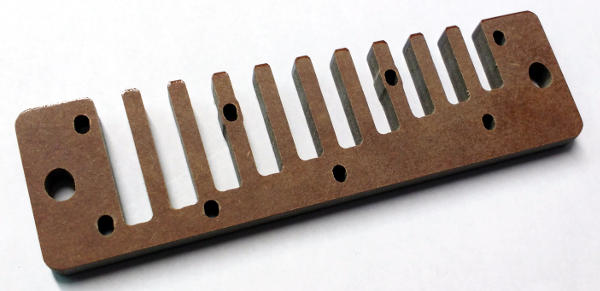
HarpMaster, BluesMaster:
Fits Seydel 1847, SOLIST PRO and FAVORITE
More information and instructions for installing my combs are found on the Combs page.
Fits the following harps:
Big River, Blues Harp, Crossharp, Proharp, MeisterKlasse.
Please note, Hohner assimilated a few harps into the MS line over the years:
Fits Hohner Golden Melody classic harmonicas. This is not meant for the Progressive type which has a different design.
More information and instructions for installing my combs are found on the Combs page.
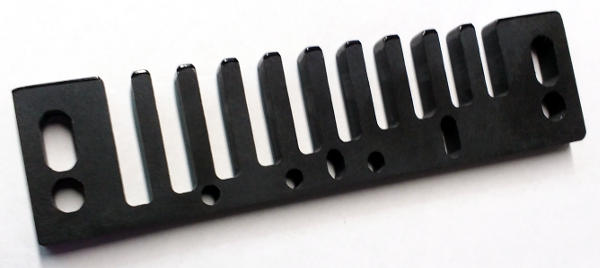
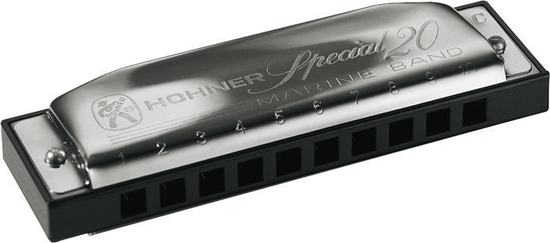
Fits Hohner Special 20 and Rocket harmonicas.
Note: For best overall performance, don't change the comb of a Special 20 or Rocket harmonica. I recommend using the stock ABS comb and work to get better performance by using The Reed Plate Claws™ to straighten reed plates. I only offer Special 20 and Rocket combs because some hobbyists like to experiment with the tonal qualities of switching from an ABS "recessed" comb to a solid surface "sandwich-type" comb.
Fits the following harps:
Marine Band Deluxe, Marine Band Crossover and Thunderbird. Also suits Marine Band 1896 harmonicas if you want to change the nails to screws. This includes:
- Marine Band 1896 (1950s to current *).
- Pre-war Marine Bands, including "mouse ear".
- Pre-MS Blues Harps
- Wooden-combed Old Standy.
- Pre-MS Meisterklasse
To order a custom harmonica, I ask for a CAD$100 deposit.
I will contact you promptly and we will discuss your needs. I will ask you specific questions about your custom harmonica and provide you with a firm delivery date.
If you wish to order more than one harmonica, please send me one deposit per harmonica. You can select the quantity at the bottom of this page.
Payments are made using Paypal as you Check Out. Canadian residents can also use eTransfer to send me the funds. Contact me for details.
The most complete harmonica tool kit on the market.

Full Toolkit:
Restoring old harmonicas can be rewarding. Some of those old harps have a lot of soul!
Some Vintage Marine Band harmonicas are worth restoring because they have the potential to become responsive instruments with that earthy Marine Band sound.
But some are not.
Hohner went through a difficult time in the late 80s and early 90s and the quality of their harmonicas suffered. No matter how much work you do on such a harp, the result will be a serviceable harp at best. When they were first bought, a lot of them were hardly played because of the poor quality and they were simply put away. Today, these harps are surfacing on online markets as Vintage harmonicas in great "cosmetic" condition! They are cosmetically excellent because they have had barely any use due to their poor quality out-of-the-box.
How can you tell the difference between the good and the bad vintage Marine Bands? Here's a simple way. This method can help you spot a lemon over 90 per cent of the time.

Take a look at the back of the harp. Flip it upside down and look closely under the cover plate. How many nail heads can you see in between the reeds on the draw side (the bottom reed plate)? If you can see three, the harp is from a good period - either before or after the difficult time in the 1980s and 1990s.
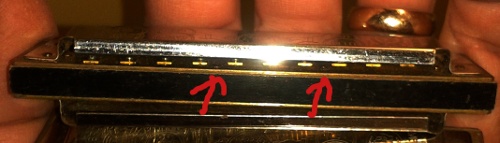
If you can only see two nail heads, you have a harp that is most likely not going to be as playable as you would like it to be no matter how much work you do on it.
 Harmonicas like the Lee Oskar, the Hohner Special 20 and the Suzuki HarpMaster have a "recessed" plastic comb that surrounds the reed plates. Your lips don't make contact with the front of the reed plate, instead, they are in contact with the plastic comb.
I think the best practice for upgrading these models of harmonica is to *keep* the factory ABS comb. Extra performance can be gained by making the reed plates perfectly flat by flatsanding the draw reed plate and using the Reed Plate Claws™ to straighten the plates.
But for those hobbyists who like to experiment with the tonal qualities of switching from an ABS "recessed" comb to a solid surface "sandwich-type" comb, the change can be made.
To replace the stock comb with a "sandwich-type" comb, you need to round off and smoothen the front of the reed plate so that it's comfortable in your mouth.
Here's how you do it
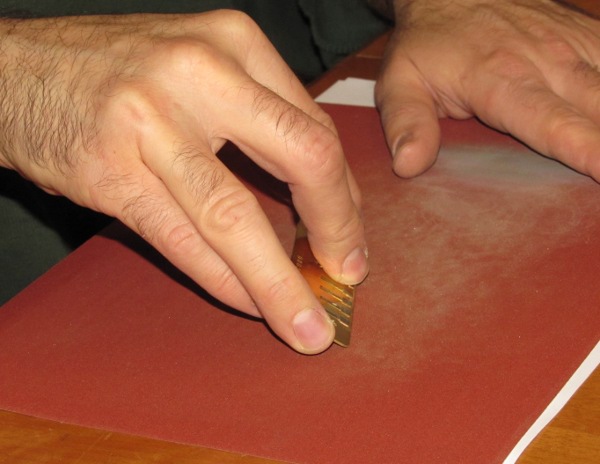
Start with some fine sandpaper. Sand down the draw reed plate as described in the document "Preparing a reed plate for use with a flat comb." This gets rid of the protruding riven ends and allows the reed plate to sit properly on the comb. It makes the harmonica more airtight and is recommended on all harmonicas, even Suzuki harmonicas which have no rivet ends.
Next, hold the reed plate at an angle and sand the front edge of the reed plate in a circular motion.
Next, do the same to both sides.
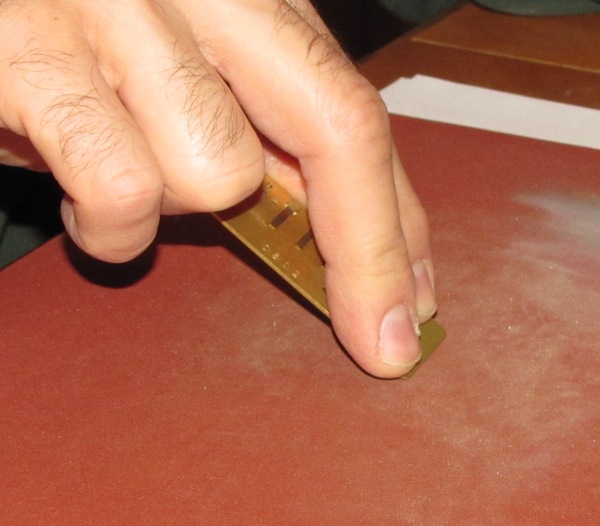
Using a piece of 600 grit (or higher) sandpaper and polish the front edge. Be sure to avoid contact with any reeds.
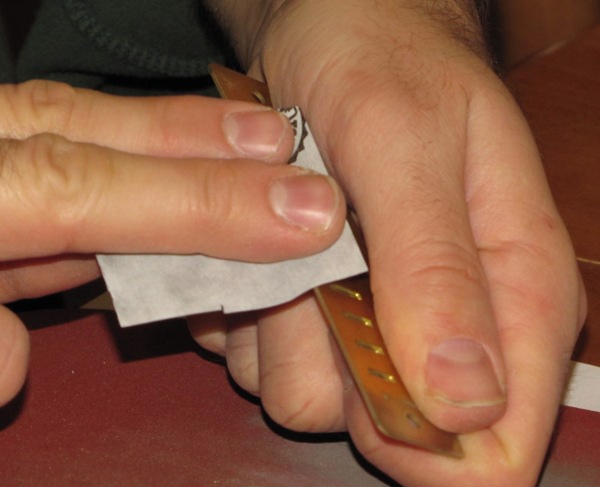
Place the side of the reedplate on your working surface and run the 600 grit sandpaper back and forth over the edge. You are making a nicely rounded edge along the side of the reed plate. Don't be afraid to rub pretty hard. Just be sure to not catch any reeds when you work on the draw reed plate.
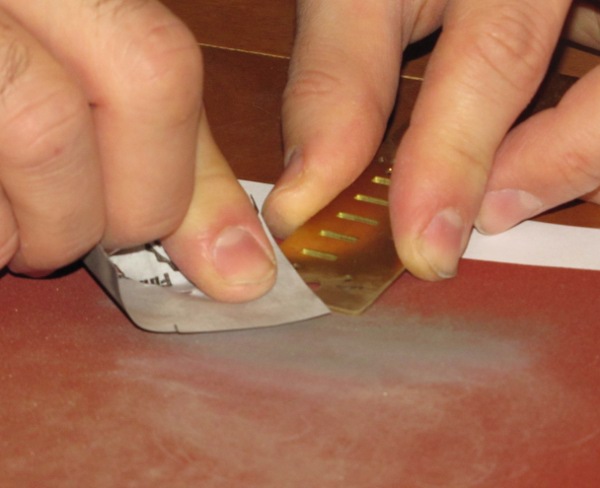
Once you are done, the corners should look smooth and comfortable.
This is a very comfortable and airtight harmonica made from Suzuki reed plates with a sandwich-type comb and a set of Special 20 cover plates. You can't buy a harp like this in stores!
Special note regarding Lee Oskar harmonica comb swapping:
The cover plate on a Lee Oskar just barely sits on the edge of the reed plate. When converting a Lee Oskar harmonica to a sandwich-type comb, moving the cover plates back will help improve airtightness. A very easy way to accomplish this is to enlarge the cover plate holes. Simply drill the existing holes with a 1/8 drill bit.
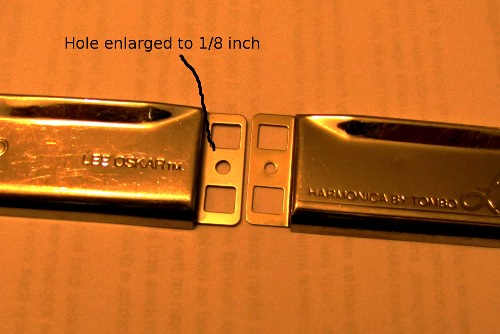
Once assembled, you will be able to position the Lee Oskar cover plates further back.

My very first "real", professional-grade harmonica was a Lee Oskar. I always had the hardest time bending notes on that thing. Had I known then what I know now, it probably would have become my favorite harmonica. Instead, I spent years fighting with Lee Oskar harmonicas.
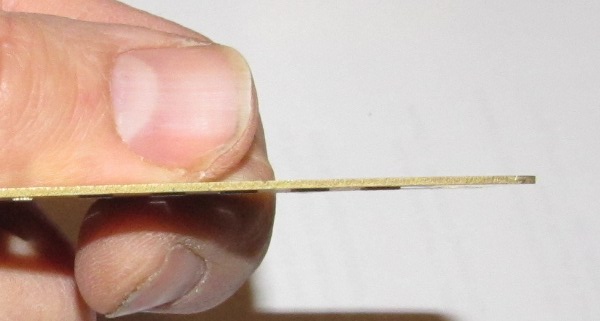
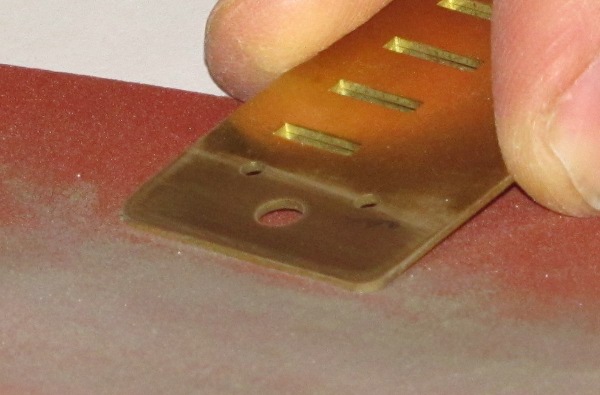
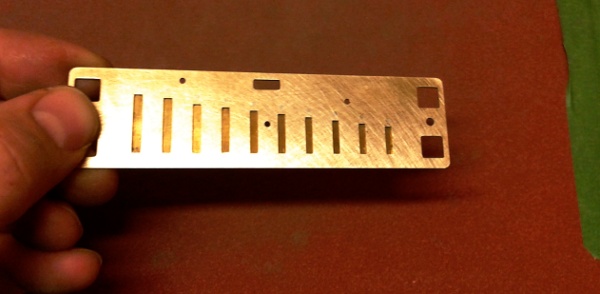
One of the biggest problems with these kinds of harps is that they are not airtight. They seem to me to be pretty difficult to play up in the high end. I think I found out why. Whenever I sand the draw plate of a Lee Oskar harmonica, I notice that holes nine and ten share a low spot. They share common airspace. This is right where the serial number is stamped on the other side of the plate.
After sanding the plate down half-way, this is how it looks. The low spot is the dark area on the plate:
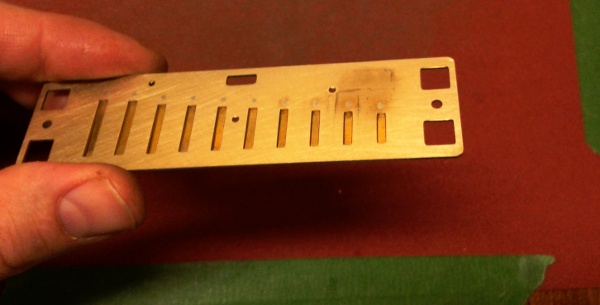
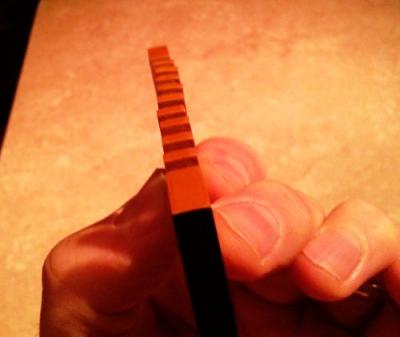
After some more elbow grease, this is the result. Everything is shiny and all the same color.
Once reassembled, the harmonica is much more airtight and the bends are much easier to control - especially the blow bends.
With good reed work and a little embossing, any harp can play overblows as passing notes.
The overblows in this video can be hit cleanly. They cannot be played with any more expression such as being sustained or bent. That's the difference between a regular harp that can play overblows and an "Overblow" harp. The overbends on the Overblow harp are meant to be played with expression and will not squeal or drop out when bent up.
Someone asked me what an overblow bent up 6 semitones sounds like.
Here is is. (You may need to right-click to download the MP3 file.)
This is a Bb Overblow harp in production. It is far from done and has no wax to help make the note more stable. All this harp has so far is reed work and heavy embossing.
The unbent 6-overblow on this harp about 20 cents flat of Ab. Six semitones up from that is D, which is the same note as 8 blow. In the audio clip I play the 8 blow first to get the pitch into my head. Then I play the 6 OB and bend it up.
I aim for an Overblow harp to be able to play a bent overblow 5-6 semitones before I consider it ready to go. Will someone ever play that note as an overblow in a performance?
No!
What's the point, then? Well, without an objective way to assess performance, how can you know what you are getting?
It follows that the higher you can bend that note without it falling of or squealing terribly, the better the overblow will sound in its more-often played range - usually bent up a maximum of 2 semitones in a performance.
This is not the best measure of the quality of a harp, but all the other qualities are hard to measure or even put into words. So for now, this is probably the most obvious way to determine the level of performance of an overblow harp.
 I am the first to admit that you usually don't need to replace the comb in your harmonica to make it play well.
I have been working on stock combs (the combs that come with the harmonica from the factory) for years. They need to be made more airtight to make the harmonica play as well as it should. It's possible to flatten these combs and make them waterproof to perform at a very high level.
The problem with restoring used wooden combs is that they can be very unpredictable. The comb shown in the photo on the right is a stock Hohner Marine Band comb that had been restored. It was perfectly flat all throughout the restoration process until the very last step - final cleaning. Despite having been sealed with three coats of varnish, it warped horribly after being exposed to water. This is completely unacceptable.
I've found that about one in fifty such combs will do this. It's possible to avoid the use of replacement combs and only work on stock combs, but it's too time-consuming to be cost-effective. And it offers no benefit. The factory wooden comb doesn't offer any better tone or response than another type of material. In fact, unless its comb is perfectly flat, it will worsen how the instrument sounds and responds.
I finally decided that the most effective solution would be for me to make my own water-resistant combs. I wanted to make combs that are very airtight, beautiful and made from sustainable, environmentally-friendly materials. This method is better, faster and cheaper than restoring the stock combs. I am extremely pleased with the result.
I am proud to use these combs in my custom harmonicas as well as part of harmonica service. I am also offering them to you for your own use.
Copyright © 2026 Andrew Zajac - All rights reserved